4月メモ・リンク集
4 月に調べたことのメモです。
Angular 関連
- angular-rx-next-error-complete-finalize - StackBlitz
- complete と finalize の挙動確認サンプル
- next => next => … => error => finalize
- next => next => … => complete => finalize
- complete と finalize の挙動確認サンプル
Angular 6
リリース前の予習に。
- Angular 6 — What can we expect? – Jeroenouw – Medium
- Main new features
Angular elements, CDK, Ivy renderer, Bazel & Closure compiler, ng update & ng add, RXJS 6, Webpack 4, TypeScript 2.7 support
- Main new features
- Are you ready for Angular 6? – Valentyn Yakymenko – Medium
RouterModule Changes
FormsModule Changes
Angular CLI 1.7
- Setting budgets with new Angular CLI – frontend.coach – Medium
With the new 1.7 release of @angular/cli we now have a possibility to add a “weight watcher” for our scripts.
- Angular v6 で導入される Tree-Shakable DI の紹介 - lacolaco
モーダルの状態を ngrx で管理する
- UI state management with Redux in Angular 4 (Example) | hack.guides()
core=>layout=>openedModalName: stringという state を用意openedModalNameを受け取るコンポーネントをAppComponentに配置@Inputの setter でうけとりモーダルの Open/Close をハンドリングする
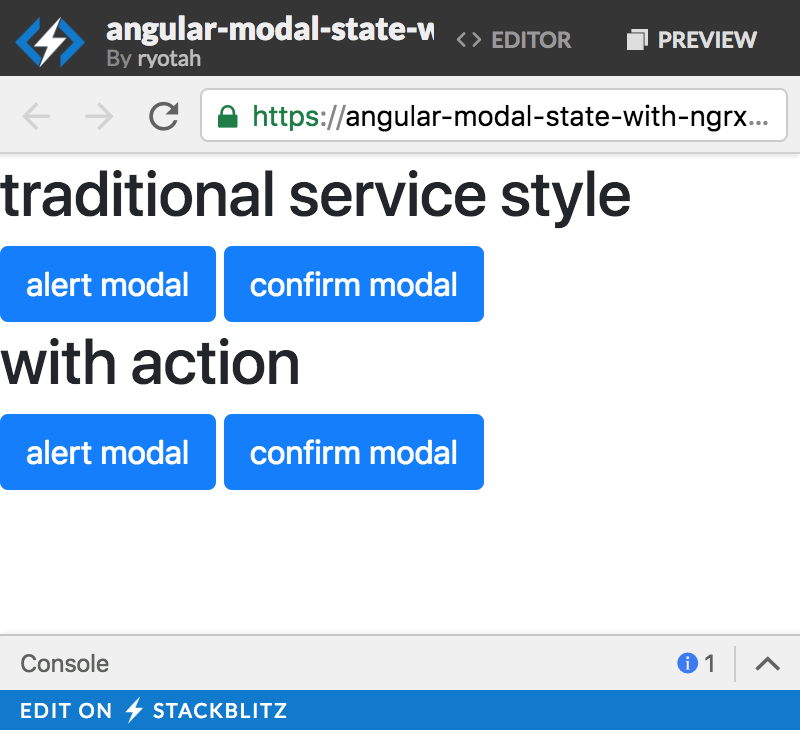
- angular-modal-state-with-ngrx-wip - StackBlitz
- ngrx で管理する方法と今まで通りの方法の比較デモ
- (途中まで)
- 今の考え、実装に必要なタスク
ngrx の状態管理を Router (URL) 起点にする
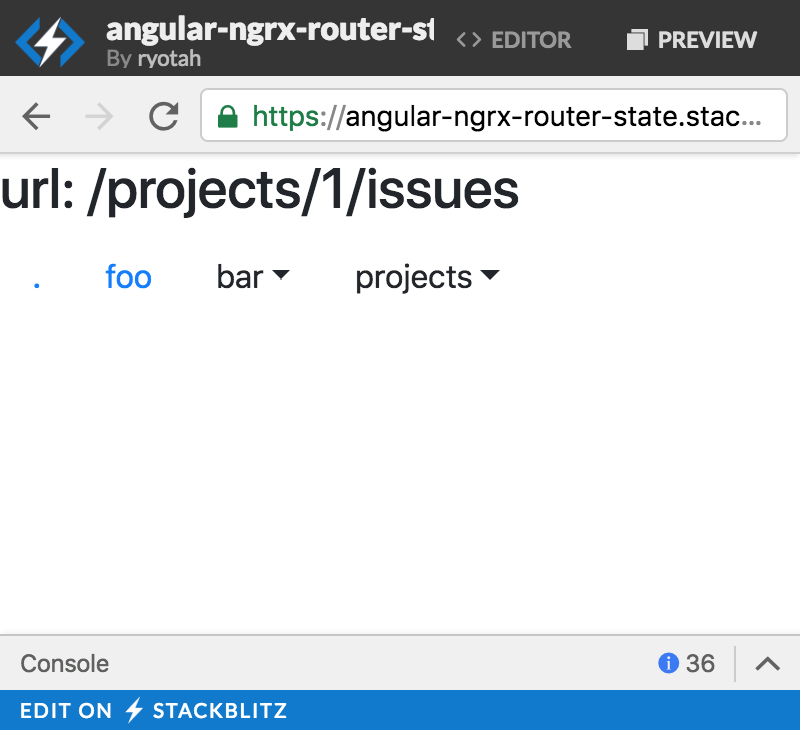
- angular-ngrx-router-state - StackBlitz
- Using NgRx 4 to Manage State in Angular Applications を参考にしたサンプル
- 階層構造を少し複雑にしている
/projects/:id/dashboard,/projects/:id/issues;page=1など- (まあサンプルは途中なんですけどね)
foo,bar/:idまで
/projects/:id/issues;page=1のような URL で 取得するデータが id と page に関係する場合
Rails 関連
- Rails チュートリアル復習用メモ - ryotah’s blog
- Ruby on Rails チュートリアル:実例を使って Rails を学ぼう を読んだ時の復習メモ
- Active Record バリデーション | Rails ガイド
update_attributeはバリデーションを実行しない
マイグレーション
- Railsのmigrationの基本とレシピ集 - Rails Webook
※upとdownは、changeメソッドの代わりに使います。 upはrake db:migrateの実行時に実行され、downはrake db:rollback時に実行されます。
データの投入 rake db:seedコマンド
rake db:drop,rake db:schema:load
Active Record クエリインターフェイス
- Active Record クエリインターフェイス#OR条件 | Rails ガイド
- Rails4.2 で like 句のサニタイズをする - hotoolong’s blog
- where で複数条件検索 - Qiita
Active Record コールバック
class Order < ApplicationRecord
  before_save :normalize_card_number, if: :paid_with_card?
end
class Order < ApplicationRecord
  before_save :normalize_card_number,
    if: Proc.new { |order| order.paid_with_card? }
end
JSのテスト 関連
- Getting Started · Jest
- 初めて使ってみた
- 日本語のドキュメントもしっかりして学習コストが低そう
- jasmineっぽい?
- angular - Why use spyOn instead of jasmine.createSpy? - Stack Overflow
- jasmine.createSpy => 裸のスパイ関数
spyOn を利用してインスタンスメソッドの挙動を確認する
it('calls self bar method', () => {
  spyOn(Foo.prototype, 'bar');
  new Foo();
  expect(Foo.prototype.bar).toHaveBeenCalled();
});
Docker
- Docker 一括削除コマンドまとめ - Qiita
docker system prune
- docker-compose run | Docker Documentation
docker-compose run- サービス群が起動していない状況でも動かせる
—rmRemove container after run. Ignored in detached mode.
Circle CI
- Session not created exception: Chrome version must be >= 62.0.3202.0 - Bug Reports - CircleCI Community Discussion
- Circle Ci で提供されている Docker image の Chrome をアップデートする
- run:
      name: Install Chrome
      command: |
        wget -q -O - https://dl.google.com/linux/linux_signing_key.pub | sudo apt-key add -
        sudo sh -c 'echo "deb [arch=amd64] http://dl.google.com/linux/chrome/deb/ stable main" >> /etc/apt/sources.list.d/google.list'
        sudo apt-get update
        sudo apt-get -y install google-chrome-stable
TypeScript
http://www.typescriptlang.org/docs/handbook/advanced-types.html#mapped-types
Mapped types は便利。
type Keys = 'option1' | 'option2';
type Flags = { [K in Keys]: boolean };

// 以下は自分の利用例
export const DateFormats: {
  [key in DateFormatTypes]: DateTimeFormatOptions
}
...
export const DateFormats: {
  [key in DateFormatTypes]: DateTimeFormatOptions
}
Partial<T>も最近使うようになった。
Note that Readonly
and Partial are so useful, they are included in TypeScript’s standard library along with Pick and Record:
(Pick, Recordはまだ使ったことない)
その他
- GitHub - alexjoverm/typescript-library-starter: Starter kit with zero-config for building a library in TypeScript, featuring RollupJS, Jest, Prettier, TSLint, Semantic Release, and more!
- 依存ライブラリがあるが、自分が作成するライブラリに取り込みたくない場合
rollup.config.tsのexternal設定を変更する
- 依存ライブラリがあるが、自分が作成するライブラリに取り込みたくない場合
3月メモ・リンク集
3月に調べたことのメモです。
Angular関連
- DESIGN DOC (Ivy): Separate Compilationを読む - らこらこブログ
- RxJS: Avoiding switchMap-Related Bugs – Angular In Depth
If the user clicks the remove buttons for several items in the cart, what happens depends upon how rapidly the buttons are clicked.
- 安易に使わずに、この場合はmergeMapが仕様に合っていますよという話
React関連
- Tutorial: How to set up React, Webpack 3, and Babel, in 2017
- Reactの新機能「Time Slicing」と「Suspense」をFacebookが紹介。非同期レンダリングを活用しUXをサクサクに向上 - Publickey
- Time Slicing
CircleCI関連
Angularで作成したアプリのCircleCI環境を2.0に移行した時のメモです。
2.0 Docs - CircleCI(オフィシャルドキュメント)
オフィシャルからは、これくらいの資料を確認。
Angular対応
- angular-cli/continuous-integration.md at master · angular/angular-cli · GitHub
When using Chrome in CI environments it has to be started without sandboxing. We can achieve that by editing our test configs. *
karma.conf.jsの設定変更,protractor.conf.jsをextendするためのprotractor-ci.conf.jsなど
- How we used CircleCI 2.0 to build and deploy an Angular app to AWS S3
- この記事読むだけで必要なことはほとんど把握できました
It has 3 main components: a version, a list of jobs, and a list of workflows.
...
Common things that you can achieve within a job include: - Installing the tools you need to run/build/test your project - Executing bash commands - Storing or restoring items from the CircleCI cache
...
The key of the cache is generated using the checksum function, which will output a base64 encoded hash of the package.json file’s content.
...
We run the build command. Notice that we are going to use a multi-line command with each line running in the same shell, so we start the command with the pipe (|) character.
...
その他
- ruby on rails - How to give Circle CI SSH access to my server? - Stack Overflow
- 設定を追加
- Where does CircleCI-2.0 store the ssh private keys? - DevOps Stack Exchange
xvfb
Rails関連
- 他言語習得済みの人が Ruby on Rails で開発する前に読んでおいた方がよさげなURL一覧
- 他言語からのRuby入門
シンボルを使うか文字列を使うかで迷ったなら、 ハッシュのキーのようにオブジェクトを識別したいのか、 それとも前述の”george”などのようにコンテンツを表したいのかを、 選択の指針にしてください。
- N+1問題を検出してくれるgem、bulletを導入する - まえとうしろ
- N+1問題
Android関連
もしかしたらAndroidエンジニアになるかも、という状況があったので設計まわりについて調べてみた時の記事リンクです。Androidアーキテクチャも面白そう。
- Kotlin + Architecture Component + Dagger2によるAndroidアプリ設計 - Qiita
- イケてるAndroidオープンソースアプリ集 - Qiita
- Androidアーキテクチャことはじめ ― 選定する意味と、MVP、Clean Architecture、MVVM、Fluxの特徴を理解する - エンジニアHub|若手Webエンジニアのキャリアを考える!
その他
- Webアプリケーション開発者から見た、MVCとMVP、そしてMVVMの違い - Qiita
- イメージつきでわかりやすい。ありがたいことです
Rails チュートリアル復習用メモ
以下を参考にした、Rails アプリを作成する手順の覚書です。
- Ruby on Rails チュートリアル:実例を使って Rails を学ぼう
- GitHub - yasslab/sample_apps: Rails チュートリアルの各章が終わった状態を集めたリポジトリです。
モデルとコントローラーの基本的な部分を知ることが目的だったので、モデルの応用的な部分や View 周りはできるだけ省いたアプリケーションに仕上がっています。具体的には 4, 11, 12, 14 章をスキップし、それ以外の各章もスタイルやインテグレーションテストについては省いています。(発展的なログイン機構、アカウント有効化のメール送信、パスワード再設定、ユーザーのフォローなどが機能として未実装。)
- 新規アプリ作成
- Gemfile 更新
- モデルを作成
- コントローラー作成
- ルーティングを設定
- セッションヘルパー
- サンプルデータを追加
- ビューとコントローラーを調整
- 元記事のメモ/リンク
- Rails ガイドより
新規アプリ作成
rails _5.1.4_ new first_app
rails server
# => http://localhost:3000/
Gemfile 更新
feat: upadte Gemfile · ryotah/rails-tutorial@6336633
bundle install --without production
モデルを作成
User モデルと Micropost モデルを作成します。
User モデルを作成
rails generate model User name:string email:string password_digest:string
# => app/models/user.rb
# => db/migrate/xxx_create_users.rb
# => test/fixtures/user.yml
# => test/models/user_test.rb

rails db:migrate
# => db/schema.rb
# Rails 4以前
# bundle exec rake db:migrate
すでに存在するモデルにインデックスを追加。
rails generate migration add_index_to_users_email
生成されたdb/migrate/[timestamp]_add_index_to_users_email.rbを更新してから migrate を実行。
class AddIndexToUsersEmail < ActiveRecord::Migration[5.0]
  def change
    # 以下の行を追加
    #
    # unique: true => 一意性を強制
    add_index :users, :email, unique: true
  end
end
User モデルに validates, has_secure_password, has_many :microposts, dependent: :destroy などを追加。
class User < ApplicationRecord
  has_many :microposts, dependent: :destroy
  before_save { self.email = email.downcase }
  validates :name,  presence: true, length: { maximum:  50 }
  VALID_EMAIL_REGEX = /\A[\w+\-.]+@[a-z\d\-.]+\.[a-z]+\z/i
  validates :email, presence: true, length: { maximum: 255 },
                    format: { with: VALID_EMAIL_REGEX },
                    uniqueness: { case_sensitive: false }
  has_secure_password
  validates :password, presence: true, length: { minimum: 6 }, allow_nil: true

  def User.digest(string)
    cost = ActiveModel::SecurePassword.min_cost ? BCrypt::Engine::MIN_COST :
                                                  BCrypt::Engine.cost
    BCrypt::Password.create(string, cost: cost)
  end
end
(メモ)rails console からユーザーを追加
user = User.create(name: "Michael Hartl", email: "mhartl@example.com", password: "foobar", password_confirmation: "foobar")

user.authenticate("foobaz")
# => false
!!user.authenticate("foobar")
# => true
Micropost モデル
rails generate model Micropost content:text user:references
生成されたdb/migrate/[timestamp]_create_microposts.rbを更新。
class CreateMicroposts < ActiveRecord::Migration[5.1]
  def change
    create_table :microposts do |t|
      t.text :content
      t.references :user, foreign_key: true

      t.timestamps
    end
    # 以下の行を追加
    #
    # インデックスを追加して、user_id に関連付けられたマイクロポストを
    # 作成時刻の逆順で取り出しやすくする
    add_index :microposts, [:user_id, :created_at]
  end
end
Micropost モデルに validates, default_scope を追加。(belongs_to :user は最初から用意されている。)
class Micropost < ApplicationRecord
  belongs_to :user
  default_scope -> { order(created_at: :desc) }
  validates :user_id, presence: true
  validates :content, presence: true, length: { maximum: 140 }
end
テスト
- https://github.com/ryotah/rails-tutorial/blob/251afb06508ad9357689b1d182e64d999ed97ef4/test/models/user_test.rb
- https://github.com/ryotah/rails-tutorial/blob/251afb06508ad9357689b1d182e64d999ed97ef4/test/models/micropost_test.rb
- fixtures を用意
# 全テストを実行
rails test

# modelsのみテストを実行
rails test:models

# 特定ファイルのテストを実行
rails test test/models/micropost_test.rb
コントローラー作成
必要なControllerを作成。
rails generate controller StaticPages home
rails generate controller Users new
rails generate controller Sessions new
rails generate controller Microposts
ルーティングを設定
config/routes.rbを更新
Rails.application.routes.draw do
  # root_path
  root 'static_pages#home'

  # 名前付きルートを定義
  get '/signup', to: 'users#new'
  post '/signup', to: 'users#create'
  get '/login', to: 'sessions#new'
  post '/login', to: 'sessions#create'
  delete '/logout', to: 'sessions#destroy'

  resources :users
  resources :microposts, only: [:create, :destroy]
end
セッションヘルパー
- 以下 5 つを定義
- ログイン
- セッション情報から現在のユーザー(ログインユーザ)を取得
- ログインユーザーか確認
- ログイン済みか確認
- ログアウト
module SessionsHelper
  def log_in(user)
    session[:user_id] = user.id
  end

  def current_user
    @current_user ||= User.find_by(id: session[:user_id])
  end

  def current_user?(user)
    user == current_user
  end

  def logged_in?
    !current_user.nil?
  end

  def log_out
    session.delete(:user_id)
    @current_user = nil
  end
end
ApplicationControllerでincludeする。(各ビューとコントローラーで利用できるようになる)
class ApplicationController < ActionController::Base
  protect_from_forgery with: :exception
  include SessionsHelper
end
サンプルデータを追加
https://github.com/ryotah/rails-tutorial/blob/b27827169748425dbff08188d97c366eb73ec1fb/db/seeds.rb
rails db:seed
ビューとコントローラーを調整
ヘッダー
- https://github.com/ryotah/rails-tutorial/blob/0198d75b02672dbac7e96f08927afd7f004b45c8/app/views/layouts/_header.html.erb
logged_incurrent_user
(メモ)デバッグ
<%= debug(params) if Rails.env.development? %>
ユーザー一覧
views/users/index.html.erbを追加。
<h1>Users#index</h1>
<%= render @users %>
views/users/_user.html.erbを追加。(render @usersに対応するパーシャル)
<div><%= user.name %>, <%= user.email %></div>
コントローラーにindexを追加。
class UsersController < ApplicationController
  # ...
  def index
    @users = User.all
  end
  # ...
end
ログイン
views/sessions/new.html.erbにフォームを追加。
<%= form_for(:session, url: login_path) do |f| %>
  <%= f.label :email %>
  <%= f.email_field :email, class: 'form-control' %>
  <%= f.label :password %>
  <%= f.password_field :password, class: 'form-control' %>
  <%= f.submit "Log in", class: "btn btn-primary" %>
<% end %>

<p>New user? <%= link_to "Sign up now!", signup_path %></p>
コントローラーにcreateを追加。
def create
  user = User.find_by(email: params[:session][:email])
  if user && user.authenticate(params[:session][:password])
    log_in user
    redirect_to user
  else
    flash.now[:danger] = 'Invalid email/password combination'
    render 'new'
  end
end
(メモ)Flash
<% flash.each do |message_type, message| %>
  <div><%= message_type %> | <%= message %></div>
<% end %>
ユーザー作成
- feat: implement user signup · ryotah/rails-tutorial@cb0c924
- コントローラーの
new,create - Strong Parameters
app/views/users/new.html.erbにフォームを追加
- コントローラーの
<%= form_for(@user, url: signup_path) do |f| %>
<%= render 'shared/error_messages', object: f>
# ...
ユーザー詳細
- feat: show a user detail · ryotah/rails-tutorial@340cf3a
- コントローラーの
show app/views/users/show.html.erbでユーザー名とマイクロポストを表示
- コントローラーの
ホーム(マイクロポスト作成)
- feat: post a micropost · ryotah/rails-tutorial@98a775c
- ログイン済みユーザーかどうか確認する
logged_in_userをApplicationControllerに追加 MicropostsControllerのcreateを実装before_action :logged_in_user, only: :create
app/views/static_pages/home.html.erbにマイクロポスト用のフォームを追加
- ログイン済みユーザーかどうか確認する
<h1>StaticPages#home</h1>
<p>Find me in app/views/static_pages/home.html.erb</p>  <p>Find me in app/views/static_pages/home.html.erb</p>
<% if logged_in? %>
  <%= current_user.name %>, <%= current_user.email %>
  <%= form_for(@micropost) do |f| %>
    <%= render 'shared/error_messages', object: f.object %>
    <%= f.text_area :content, placeholder: "Compose new micropost..." %>
    <%= f.submit "Post", class: "btn btn-primary" %>
  <% end %>
<% end %>
元記事のメモ/リンク
- コラム 1.2. お手軽すぎる Scaffold の甘い誘惑
- 5.2.1 アセットパイプライン
- 5.3.2 Rails のルート URL
なお、Rails チュートリアルでは一般的な規約に従い、基本的には_path 書式を使い、リダイレクトの場合のみ_url 書式を使うようにします。これは HTTP の標準としては、リダイレクトのときに完全な URL が要求されるためです。ただしほとんどのブラウザでは、どちらの方法でも動作します。
- コラム 6.2. データベースのインデックス
- 6.3.1 ハッシュ化されたパスワード
password_digest- セキュアにハッシュ化したパスワード
password,password_confirmation- 2 つのペアの仮想的な属性
- 存在性と値が一致するかどうかのバリデーションも追加
authenticateメソッドhas_secure_passwordを利用してパスワードをハッシュ化するためにbcryptgem が必要
- 表 7.1: リスト 7.3 の Users リソースが提供する RESTful なルート
- リスト 8.21: fixture 向けの digest メソッドを追加する
digest メソッドを User クラス自身に配置して、クラスメソッドにすることにしましょう
- 13.1.3 User/Micropost の関連付け
@user = users(:michael)
# このコードは慣習的に正しくない
@micropost = Micropost.new(content: "Lorem ipsum", user_id: @user.id)
Rails ガイドより
users = User.all
user = User.first
david = User.find_by(name: 'David')
- update
save- 属性変更後に実行が必要
update- 複数の属性を更新できる(
save不要)
- 複数の属性を更新できる(
- update_attribute => http://api.rubyonrails.org/classes/ActiveRecord/Persistence.html#method-i-update_attribute
- ひとつの属性を更新
- バリデーションがスキップされる
- delete
- Active Record バリデーション | Rails ガイド
- valid? と invalid?
- format, length, presence, uniqueness, など
case_sensitive
- Active Record の関連付け (アソシエーション) | Rails ガイド
- Rails のルーティング | Rails ガイド
- 2 リソースベースのルーティング: Rails のデフォルト
resources- 名前付きヘルパー
- 2 リソースベースのルーティング: Rails のデフォルト
- Rails セキュリティガイド | Rails ガイド
- Rails のコマンドラインツール | Rails ガイド
- https://railsguides.jp/command_line.html#rails-console
rails consolerails console --sandbox
- https://railsguides.jp/command_line.html#rails-console
2月メモ・リンク集
2月に調べたことのメモです。
- リサイザー
- Show More/Less コンポーネント
- ドラッグアンドドロップ(dnd)
- Googleスプレッドシート的なスクロール
- AngularのDIに関して
- Ruby, Rails関連
- その他

リサイザー
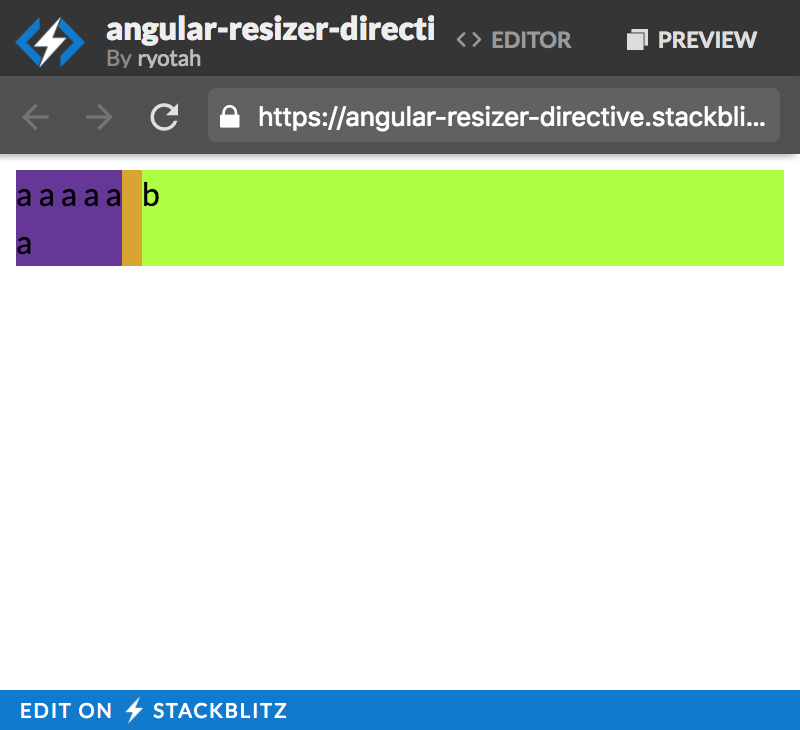
- angular-resizer - StackBlitz
- angular-resizer-directive - StackBlitz
ResizableComponentをResizableDirectiveとGrabberDirectiveにわけた- window.getComputedStyle - Web API インターフェイス | MDN
@Directive({
  selector: '[grabber]',
})
export class GrabberDirective {
  // ...
  constructor(
    private elm: ElementRef,
    @Host() @SkipSelf() private resizable: ResizableDirective
  ) { }
  // ...
}
- MouseEvent - Web API インターフェイス | MDN
- MouseEvent.offsetX (Y), MouseEvent.clientX (Y), MouseEvent.pageX (Y), MouseEvent.screenX (Y)
Show More/Less コンポーネント
function getLineHeight(element: HTMLElement): number {
  let lineHeight = parseInt(
    window.getComputedStyle(element, undefined).getPropertyValue('lineHeight'),
    10
  );
  if (isNaN(lineHeight)) {
    const clone = element.cloneNode() as HTMLElement;
    clone.innerHTML = '<br>';
    element.appendChild(clone);
    lineHeight = clone.clientHeight;
    element.removeChild(clone);
  }
  return lineHeight;
}
ドラッグアンドドロップ(dnd)
実装の必要がなくなったので、参考にしようとしたリンクのみ。
- ネイティブ HTML5 ドラッグ&ドロップ - HTML5 Rocks
- Simple Drag and Drop with Angular 2
- react-dnd/react-dnd: Drag and Drop for React
- GitHub - akserg/ng2-dnd: Angular 2 Drag-and-Drop without dependencies
- GitHub - STRML/react-grid-layout: A draggable and resizable grid layout with responsive breakpoints, for React.
- Top 5 Angular 2 Drag and Drop Demos | AngularJS 4U
Googleスプレッドシート的なスクロール
- angular-scrollbar-like-spreadsheet - StackBlitz
- コンテンツ(A)とスクロールエリア(B)を用意
- A自体のスクロールバーは利用しない
- Bの内部の要素をAの高さに合わせる
- Bのスクロールに合わせてAを移動、A上発生したホイールイベントを利用してBを移動
// スクロール内部の高さを対象の高さに合わせる
const height = this.contentInner.nativeElement.clientHeight;
this.scrollInner.nativeElement.style.height = `${height}px`;

// スクロール時に
this.scroll.nativeElement.addEventListener('scroll', (e) => {
  this.content.nativeElement.scrollTop = e.target.scrollTop;
});

// コンテンツエリアでマウホイールイベント発生時に
this.content.nativeElement.addEventListener('wheel', (e) => {
  const result = this.content.nativeElement.scrollTop + e.deltaY
  this.content.nativeElement.scrollTop = result;
  this.scroll.nativeElement.scrollTop = result;
});
AngularのDIに関して
Ruby, Rails関連
VS CodeでRubyを書く
- Ruby - Visual Studio Marketplace
- lint用に利用している
"ruby.lint": {
  "rubocop": true,
  "ruby": {
      "unicode": true //Runs ruby -wc -Ku
  },
},
その他
- Style Binding & NgStyle in Angular 2 ← Alligator.io
<p [style.font-size.em]="'3'">という記述方法
- パフォーマンス
- ハイパフォーマンス・アニメーション - HTML5 Rocks
- ハイパフォーマンスCSS3アニメーション——60fpsを実現するベストプラクティス - WPJ
- スタイル -> レイアウト -> ペイント -> コンポジット
will-change
1月メモ・リンク集
1月に調べたことのメモです。
Angular関連
Date系ライブラリとIANA
最近はLuxonを利用しています。Intlのブラウザ対応状況、他のライブラリのタイムゾーン関連のサポートについて気になったので、そのあたりを調べた時のメモです。
- ECMAScript Internationalisation compatibility table
- IE11は
accepts IANA timezone namesに対応していない
- IE11は
- TimeZone support · Issue #19 · andyearnshaw/Intl.js · GitHub
- IANA data implementedしている他のライブラリ情報なども
- GitHub - date-fns/date-fns: ⏳ Modern JavaScript date utility library ⌛️
複数のプロジェクタで共有したいロジックとコンポーネントをパッケージ化した
- TypeScripのUtilパッケージ
- GitHub - alexjoverm/typescript-library-starter: Starter kit with zero-config for building a library in TypeScript, featuring RollupJS, Jest, Prettier, TSLint, Semantic Release, and more!
- これを使った
- webpackで自分で環境作ろうしたけど、これが楽すぎたので
- パッケージ自体に取り込みたくない外部ライブラリは
peerDependenciesにrollup.config.jsでexternal指定も必要(書かなくても含まれなかったんだが?)
- Write a library using TypeScript library starter
- 紹介記事
- GitHub - alexjoverm/typescript-library-starter: Starter kit with zero-config for building a library in TypeScript, featuring RollupJS, Jest, Prettier, TSLint, Semantic Release, and more!
- Angualr Component
- GitHub - dherges/ng-packagr: Transpile your libraries to Angular Package Format
- これを使った
- webpackで自分で環境作ろうしたけど(以下略)
- Angular Package Formatになる
- Angular CLIと組み合わせ可能
- パッケージに含めたいモジュールを
public_api.tsで定義する
- パッケージに含めたいモジュールを
- Git urls形式で取得することにしているのでルートの
package.jsonにmain,module,es2015,typings,metadata,filesの設定を追加- 通常は
distフォルダ自体をパッケージとして登録する(dist内のpackage.jsonを利用する)
- 通常は
- Building an Angular 4 Component Library with the Angular CLI and ng-packagr
- 紹介記事
- GitHub - dherges/ng-packagr: Transpile your libraries to Angular Package Format
必要な前提知識
最終的に上記環境を利用し、簡単にパッケージ作成ができるようになったのだが、実際には色々とつまづいた。原因は、前提となる基礎知識がかけていたから。
(基本的な公式ドキュメントはしっかり読みましょうという話)
- npm Documentation
- 11 - How to create Node.js modules | npm Documentation
- 12 - How to publish a package | npm Documentation
npm adduser,npm publish,npm version patch,npm version x.x.xなど
- 14 - How to work with scoped packages | npm Documentation
- プライベートなパッケージ作成について
@username/project-namenpm publish --access=public
- 19 - Understanding packages and modules | npm Documentation
- packageとは, moduleとは
- package.json | npm Documentation
- Tutorial for Writing a TypeScript Library
ReactのHOCs
- React Table - A lightweight, fast and extendable datagrid built for React
- Reactの Higher-order Components (HoCs) という概念に関するメモ - Qiita
- ReactのHigher Order Components詳解 : 実装の2つのパターンと、親Componentとの比較 | プログラミング | POSTD
その他
- cpx と rimraf を試す – アカベコマイリ
rimrafをよくみかけたのでrm -rfに該当する
- TypeScript の型定義ファイルと仲良くなろう - Hatena Developer Blog
- ゆるふわだったので復習
- declaration space
- Value、Type、Namespace
そのファイルがいま module なのか?を意識すると定義ファイルでハマることも少なくなると思います。
namespace が導入されたのは結構最近なので、以前からある定義ファイルでは module となっている場合があるということを頭に入れておくといいでしょう。
declare global { }
- prittierを特定フォルダ以下のtsファイルで走らせる
npx prettier --single-quote --trailing-comma es5 --write src/**/*.ts
AngularのCDK Tableのコードを読みながら、Viewの組み立て方について調べる
- CDK Tableのドキュメント
- 0: 完成版
- 1: コンポーネントを動的にaddする
- 2: 対象のコンポーネント内にaddする
- 3: コンポーネントのaddからテンプレートを取得してaddする方式に変更
- 4: table.ts, row.ts, cell.tsを用意
- 5: 行定義を追加(RowDef)
- 6: ヘッダー用の行定義を追加(HeaderRowDef)
- 7: accessorを追加
- 8: header cell, cellの定義をcolumnの定義でまとめる
- 9: おまけ
段階的に実装してみたサンプルコードを晒します。完成版とおまけを除くと8ステップにわかれています。
Viewの組み立て部分を参考にしたかったので、DataSourceやIterableDiffers, TrackByFunctionなどを利用したコードはありません。
CDK Tableのドキュメント
0: 完成版
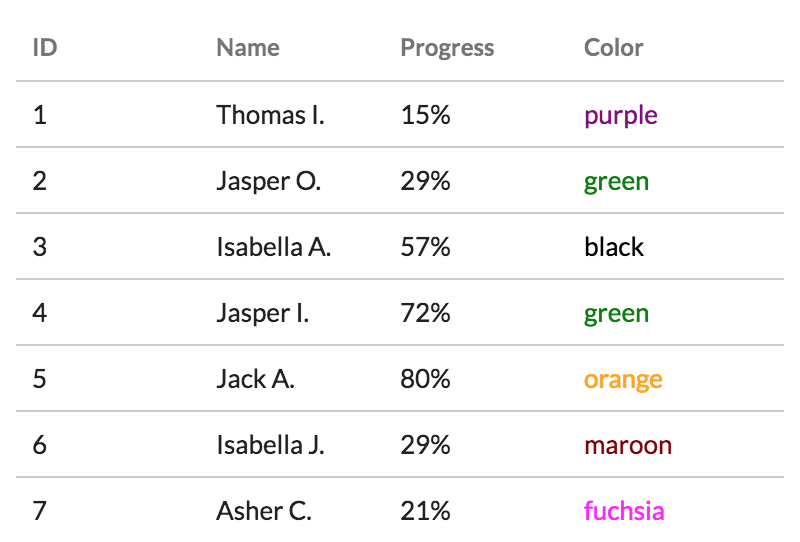
- angular-cdk-datatable-00-master - StackBlitz
- CDK Tableのオリジナルコードを抜き出して実装したもの
cell.ts,row.ts,table.ts,table-error.ts,data-source.ts,collection-views.ts
- CDK Tableのオリジナルコードを抜き出して実装したもの
1: コンポーネントを動的にaddする
- angular-cdk-datatable-01-createcomponent - StackBlitz
ViewContainerRefのcreateComponentを使う
2: 対象のコンポーネント内にaddする
- angular-cdk-datatable-02-outlet - StackBlitz
this.viewContainerRef.createComponentみたいにすると、対象のコンポーネント内部ではなく隣に実際の要素がaddされてしまう<ng-container anchor></ng-container>みたいなaddするための器を用意してあげる
3: コンポーネントのaddからテンプレートを取得してaddする方式に変更

- angular-cdk-datatable-03-createembeddedview - StackBlitz
- 柔軟に描画内容を変更したいので、「コンポーネント定義 -> createComponent」ではなく「テンプレート内に描画用テンプレートを記述 -> createEmbeddedView」する
$implicitを利用
4: table.ts, row.ts, cell.tsを用意
- angular-cdk-datatable-04-celldefs - StackBlitz
- 各セルの内容を定義するために、CellDefという考え方を導入
- この段階では実態は
export class CellDef { constructor(public template: TemplateRef<any>) {} }というDirective
5: 行定義を追加(RowDef)
app.component.html
<my-table [data]="data">
    <!-- cellを定義 -->
    <ng-container *cellDef="let data;">
        <span style="border: 1px solid cyan;">[cell-1] {{data}}</span>
    </ng-container>
    <ng-container *cellDef="let data;">
        <span style="border: 1px solid yello;">[cell-2] {{data}}</span>
    </ng-container>
    <ng-container *cellDef="let data;">
        <span style="border: 1px solid blue;">[cell-3] {{data}}</span>
    </ng-container>

</my-table>
table.html
<!-- rowを定義 -->
<ng-container *rowDef>
    <div style="border: 1px solid red; background-color: rgba(255,0,0,.2)">[row]
        <ng-container cellOutlet></ng-container>
    </div>
</ng-container>
6: ヘッダー用の行定義を追加(HeaderRowDef)

app.component.html
<my-table [columns]="columns" [data]="data">

  <!-- header cellを定義 -->
    <ng-container *headerCellDef="let data;">
        <span style="border: 1px solid cyan;">[ttl-1]{{data.title}}</span>
    </ng-container>
    <ng-container *headerCellDef="let data;">
        <span style="border: 1px solid green;">[ttl-2]{{data.title}}</span>
    </ng-container>
    <ng-container *headerCellDef="let data;">
        <span style="border: 1px solid blue;">[ttl-2]{{data.title}}</span>
    </ng-container>

    <!-- cellを定義 -->
    <ng-container *cellDef="let data;">
        <span style="border: 1px solid cyan;">[cell-1] {{data}}</span>
    </ng-container>
    <ng-container *cellDef="let data;">
        <span style="border: 1px solid green;">[cell-2] {{data}}</span>
    </ng-container>
    <ng-container *cellDef="let data;">
        <span style="border: 1px solid blue;">[cell-3] {{data}}</span>
    </ng-container>

</my-table>
table.html
<!-- header rowを定義 -->
<ng-container *headerRowDef>
    <div style="border: 1px solid magenta; background-color: rgba(255,0,255,.2)">[row]
        <ng-container cellOutlet></ng-container>
    </div>
</ng-container>

<!-- rowを定義 -->
<ng-container *rowDef>
    <div style="border: 1px solid red; background-color: rgba(255,0,0,.2)">[row]
        <ng-container cellOutlet></ng-container>
    </div>
</ng-container>
7: accessorを追加
8: header cell, cellの定義をcolumnの定義でまとめる

app.component.html
<my-table [data]="data">

    <!-- [name] columnを定義 -->
    <ng-container columnDef="name">
        <ng-container *headerCellDef>
            <span style="border: 1px solid cyan;">Name</span>
        </ng-container>
        <ng-container *cellDef="let row;">
            <span style="border: 1px solid cyan;">{{row.name}}</span>
        </ng-container>
    </ng-container>
    <!-- [age] columnを定義 -->
    <ng-container columnDef="age">
        <ng-container *headerCellDef>
            <span style="border: 1px solid green;">Age</span>
        </ng-container>
        <ng-container *cellDef="let row;">
            <span style="border: 1px solid green;">{{row.age}}</span>
        </ng-container>
    </ng-container>
    <!-- [id] columnを定義 -->
    <ng-container columnDef="id">
        <ng-container *headerCellDef>
            <span style="border: 1px solid blue;">Id</span>
        </ng-container>
        <ng-container *cellDef="let row;">
            <span style="border: 1px solid blue;">{{row.id}}</span>
        </ng-container>
    </ng-container>

</my-table>
9: おまけ
- angular-cdk-datatable-09-sort - StackBlitz
- ソートをつけました
- react-react-table - StackBlitz
- 参考としてReactだとどんな実装になるのか確認したもの
- こっちの方がシンプルですが、カラムで定義するという考え方は同じ
12月メモ・リンク集
12月に調べたことのメモです。
Angular関連
View作成や再利用について
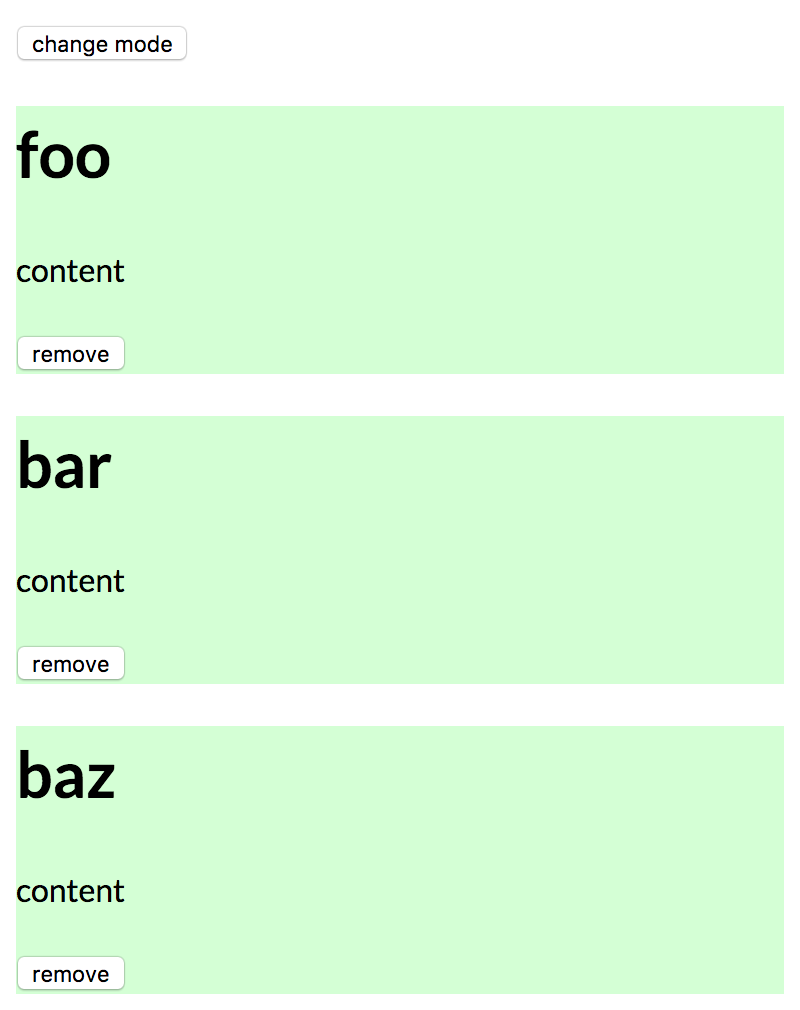
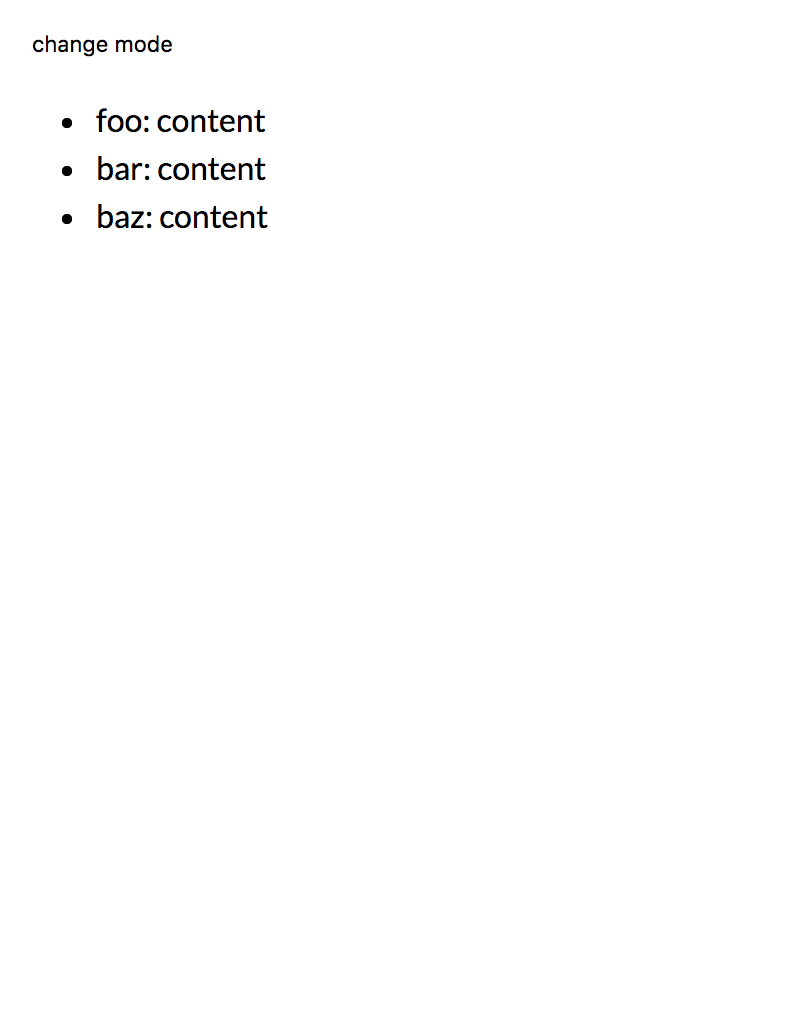
- Angular ng-template, ng-container and ngTemplateOutlet: Guided Tour
- テンプレートに関してのまとめ
- TemplateRefからの利用やngTemplateOutletでの利用
- Creating Reusable Components with NgTemplateOutlet in Angular
- テンプレートを利用した再利用可能なコンポーネントの作成
- テンプレートをContentChildを利用して読み込むことで柔軟な利用ができる
- サンプルとして
CardOrListViewComponentというコンポーネントを作成- あるItemをCardViewかListViewで表示する
- Itemが何かについては知らない
- CardView、ListViewの具体的な構造も知らない
ngTemplateOutletの利用方法let,context,$implicitについての理解
- あるItemをCardViewかListViewで表示する
- angular-reusable-components-ngtemplateoutlet - StackBlitz
- 自分で試したサンプル
- angular-reusable-components-ngcomponentoutlet - StackBlitz
- ngComponentOutletを利用してみたけど、contextにあたるもの(@Inputできるようなもの)がない
- テンプレートを利用した再利用可能なコンポーネントの作成
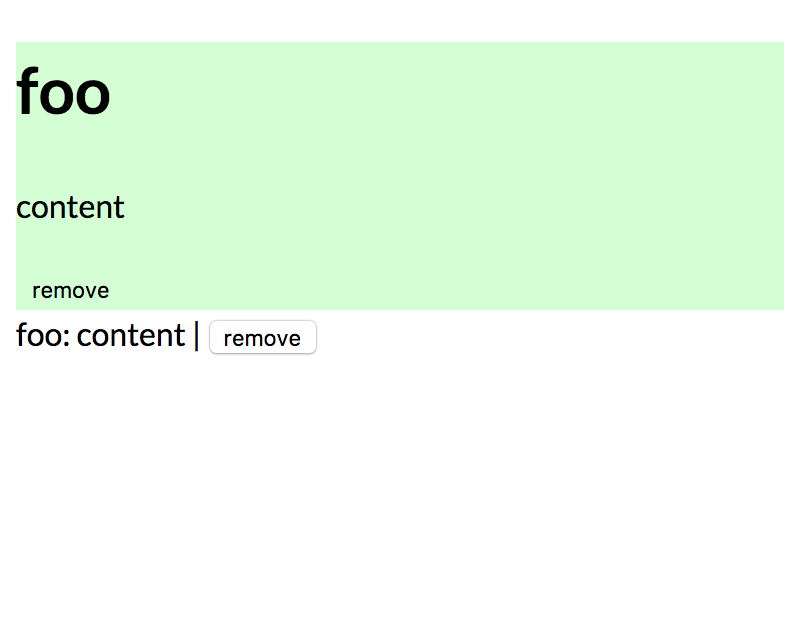
- 振る舞いを再利用するサンプル
<div [myItem]="item1" #dir="myItem">
  {{dir.item.header}}: {{dir.item.content}} | <button (click)="dir.onRemove()">remove</button>
</div>
- (WIP) createEmbeddedViewとcreateComponen - ryotah’s blog
- 「動的にコンポーネントを作成する方法」と「テンプレートを読み込んでViewを作成する方法」についてまとめ。(途中でやめている)
Form関連
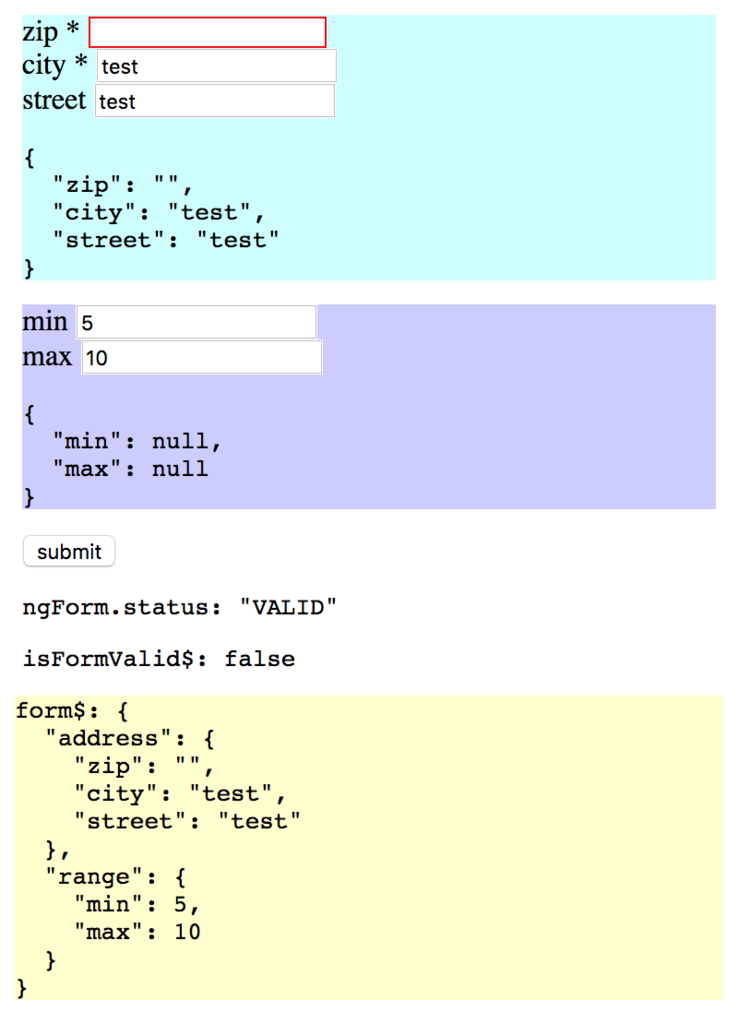
- angular-form-dynamic-form - StackBlitz
- Formのフィールドをモデルから生成
- 基本は https://angular.io/guide/dynamic-form のコード
- angular-form-ngrx - StackBlitz
- ngrxでフォームの状態管理をするサンプル
- どこまでStoreで管理するか
- touched、dirtyなどはローカルステートとして扱いStoreでは管理しない、など
touched/dirty/pristine
private markFormGroupTouched(formGroup: FormGroup) {
  (<any>Object).values(formGroup.controls).forEach(control => {
    control.markAsTouched();
    if (control.controls) {
      control.controls.forEach(c => this.markFormGroupTouched(c));
    }
  });
}
Dateライブラリ
- moment -> Luxon - ryotah’s blog
- MomentからLuxonにライブラリを変えてみた時のメモ
VSCode
コードフォーマット
{
  "singleQuote": true,
  "trailingComma": "es5"
}
tslint --fix- 今まで利用してなかったけど、便利すぎた
- TypeScript Hero の
Sort and organize your imports (sort and remove unused)をわざわざする必要なくなった
"tslint.autoFixOnSave": true,
"no-unused-variable": true,
"ordered-imports": true,
Go環境用意
- インストール
brew install go
export GOPATH=$HOME/foo/bar
export PATH=$GOPATH/bin:$PATH
GOPATH以下に開発環境を構築するgo getなどのコマンドを実行するとGOPATHフォルダにダウンロードされる
PATHを設定しておくとコマンドうつのが楽
Reactチュートリアル
Tutorial
- Tutorial: Intro To React - React
in React apps to use on names for the attributes and handle for the handler methods.
- Why Immutability Is Important
- Easier Undo/Redo and Time Travel
- Tracking Changes
- Determining When to Re-render in React
It’s strongly recommended that you assign proper keys whenever you build dynamic lists.
- react-tutorial-tic-tac-toe - StackBlitz
- 自分でやったサンプル
その他
- Parcelを利用してReact × Typescriptの環境を用意 - ryotah’s blog
- Chalarangelo/30-seconds-of-code: Curated collection of useful Javascript snippets that you can understand in 30 seconds or less.
- Font Awesome
- Font Awesome 5がでていた
- [Web Fonts] ではなく [SVG with JavaScript] が推奨
- Should I use SVG, Icon Fonts, or Images? – Web-Crunch
Why Use SVG anyway? Very small footprint and easily compressible Scalability without loss of clarity Easy to control from a design perspective.
Google Analytics
- gtag.jsとかいう新しいやつ
npm install --save-dev @types/google.analytics- Single page application tracking with gtag.js | Analytics for Web (gtag.js) | Google Developers
- Cookies and user identification with gtag.js | Analytics for Web (gtag.js) | Google Developers
コンポーネントを設計するときに


- 「飛行機のパーツ」とみるか、「2×4のブロック」とみるか
- 細かくつくる
- 汎用化と抽象化
- Viewにどこまで関係するのか(テンプレートにどこまで関係するのか)
- それは「ロジック」ではないか
- それは「振る舞い」ではない