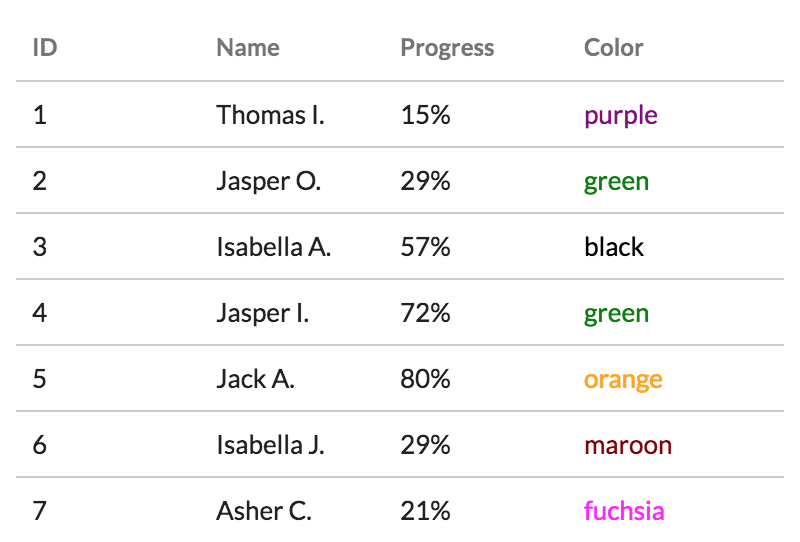
AngularのCDK Tableのコードを読みながら、Viewの組み立て方について調べる
- CDK Tableのドキュメント
- 0: 完成版
- 1: コンポーネントを動的にaddする
- 2: 対象のコンポーネント内にaddする
- 3: コンポーネントのaddからテンプレートを取得してaddする方式に変更
- 4: table.ts, row.ts, cell.tsを用意
- 5: 行定義を追加(RowDef)
- 6: ヘッダー用の行定義を追加(HeaderRowDef)
- 7: accessorを追加
- 8: header cell, cellの定義をcolumnの定義でまとめる
- 9: おまけ
段階的に実装してみたサンプルコードを晒します。完成版とおまけを除くと8ステップにわかれています。
Viewの組み立て部分を参考にしたかったので、DataSourceやIterableDiffers, TrackByFunctionなどを利用したコードはありません。
CDK Tableのドキュメント
0: 完成版

- angular-cdk-datatable-00-master - StackBlitz
- CDK Tableのオリジナルコードを抜き出して実装したもの
cell.ts,row.ts,table.ts,table-error.ts,data-source.ts,collection-views.ts
- CDK Tableのオリジナルコードを抜き出して実装したもの
1: コンポーネントを動的にaddする
- angular-cdk-datatable-01-createcomponent - StackBlitz
ViewContainerRefのcreateComponentを使う
2: 対象のコンポーネント内にaddする
- angular-cdk-datatable-02-outlet - StackBlitz
this.viewContainerRef.createComponentみたいにすると、対象のコンポーネント内部ではなく隣に実際の要素がaddされてしまう<ng-container anchor></ng-container>みたいなaddするための器を用意してあげる
3: コンポーネントのaddからテンプレートを取得してaddする方式に変更

- angular-cdk-datatable-03-createembeddedview - StackBlitz
- 柔軟に描画内容を変更したいので、「コンポーネント定義 -> createComponent」ではなく「テンプレート内に描画用テンプレートを記述 -> createEmbeddedView」する
$implicitを利用
4: table.ts, row.ts, cell.tsを用意
- angular-cdk-datatable-04-celldefs - StackBlitz
- 各セルの内容を定義するために、CellDefという考え方を導入
- この段階では実態は
export class CellDef { constructor(public template: TemplateRef<any>) {} }というDirective
5: 行定義を追加(RowDef)
app.component.html
<my-table [data]="data">
    <!-- cellを定義 -->
    <ng-container *cellDef="let data;">
        <span style="border: 1px solid cyan;">[cell-1] {{data}}</span>
    </ng-container>
    <ng-container *cellDef="let data;">
        <span style="border: 1px solid yello;">[cell-2] {{data}}</span>
    </ng-container>
    <ng-container *cellDef="let data;">
        <span style="border: 1px solid blue;">[cell-3] {{data}}</span>
    </ng-container>

</my-table>
table.html
<!-- rowを定義 -->
<ng-container *rowDef>
    <div style="border: 1px solid red; background-color: rgba(255,0,0,.2)">[row]
        <ng-container cellOutlet></ng-container>
    </div>
</ng-container>
6: ヘッダー用の行定義を追加(HeaderRowDef)

app.component.html
<my-table [columns]="columns" [data]="data">

  <!-- header cellを定義 -->
    <ng-container *headerCellDef="let data;">
        <span style="border: 1px solid cyan;">[ttl-1]{{data.title}}</span>
    </ng-container>
    <ng-container *headerCellDef="let data;">
        <span style="border: 1px solid green;">[ttl-2]{{data.title}}</span>
    </ng-container>
    <ng-container *headerCellDef="let data;">
        <span style="border: 1px solid blue;">[ttl-2]{{data.title}}</span>
    </ng-container>

    <!-- cellを定義 -->
    <ng-container *cellDef="let data;">
        <span style="border: 1px solid cyan;">[cell-1] {{data}}</span>
    </ng-container>
    <ng-container *cellDef="let data;">
        <span style="border: 1px solid green;">[cell-2] {{data}}</span>
    </ng-container>
    <ng-container *cellDef="let data;">
        <span style="border: 1px solid blue;">[cell-3] {{data}}</span>
    </ng-container>

</my-table>
table.html
<!-- header rowを定義 -->
<ng-container *headerRowDef>
    <div style="border: 1px solid magenta; background-color: rgba(255,0,255,.2)">[row]
        <ng-container cellOutlet></ng-container>
    </div>
</ng-container>

<!-- rowを定義 -->
<ng-container *rowDef>
    <div style="border: 1px solid red; background-color: rgba(255,0,0,.2)">[row]
        <ng-container cellOutlet></ng-container>
    </div>
</ng-container>
7: accessorを追加
8: header cell, cellの定義をcolumnの定義でまとめる

app.component.html
<my-table [data]="data">

    <!-- [name] columnを定義 -->
    <ng-container columnDef="name">
        <ng-container *headerCellDef>
            <span style="border: 1px solid cyan;">Name</span>
        </ng-container>
        <ng-container *cellDef="let row;">
            <span style="border: 1px solid cyan;">{{row.name}}</span>
        </ng-container>
    </ng-container>
    <!-- [age] columnを定義 -->
    <ng-container columnDef="age">
        <ng-container *headerCellDef>
            <span style="border: 1px solid green;">Age</span>
        </ng-container>
        <ng-container *cellDef="let row;">
            <span style="border: 1px solid green;">{{row.age}}</span>
        </ng-container>
    </ng-container>
    <!-- [id] columnを定義 -->
    <ng-container columnDef="id">
        <ng-container *headerCellDef>
            <span style="border: 1px solid blue;">Id</span>
        </ng-container>
        <ng-container *cellDef="let row;">
            <span style="border: 1px solid blue;">{{row.id}}</span>
        </ng-container>
    </ng-container>

</my-table>
9: おまけ
- angular-cdk-datatable-09-sort - StackBlitz
- ソートをつけました
- react-react-table - StackBlitz
- 参考としてReactだとどんな実装になるのか確認したもの
- こっちの方がシンプルですが、カラムで定義するという考え方は同じ