Parcelを利用してReact × Typescriptの環境を用意
ちょっとしたモック作成や動作確認をしたいときに使ってみようかと思います。
Parcel v1.2.0を利用。
準備
Parcelをインストール
npm install -g parcel-bundler
tsconfig.jsonを用意
{
  "compilerOptions": {
    "target": "es5",
    "module": "commonjs",
    "strict": true,
    "jsx": "react"
  }
}
Index.html
<html>
<body>
  <div id="root"></div>
  <script src="./index.tsx"></script>
</body>
</html>
Index.tsx
import * as React from 'react';
import * as ReactDOM from 'react-dom';

ReactDOM.render(
  <h1>Hello, world!</h1>,
  document.getElementById('root')
);
起動
parcel index.html
参考
- GitHub - parcel-bundler/parcel: 📦🚀 Blazing fast, zero configuration web application bundler
- Add React/TS to homepage · Issue #15 · stackblitz/core · GitHub
- StackBlitzにもReact × Typescript環境がありました
ローダーと通信エラーの実装


Angularアプリのローダーと通信時エラーの実装について。
(Angular 5.0.1を利用)
ローディング
ローダーの種類
- 通信時につねに表示するもの (A)
- 通信時に画面をブロックしたいもの (B)
Aの実装方針
HTTP_INTERCEPTORSを利用して自動で実行させる
http-interceptor-loader.ts
@Injectable()
export class HttpInterceptorLoader implements HttpInterceptor {
  constructor(private store: Store<formRoot.AppState>) {}

  intercept(
    req: HttpRequest<any>,
    next: HttpHandler
  ): Observable<HttpEvent<any>> {

    // 今回はngrxを利用
    // load開始時と終了時にカウントの増減をする
    this.store.dispatch(new LoadCountAdded());
    return next.handle(req).pipe(
      finalize(() => {
        setTimeout(() => this.store.dispatch(new LoadCountRemoved()), 0);
      })
    );
  }
}
actionとstate
/**
 * action
 */
export class LoadCountAdded implements Action {
  readonly type = LOAD_COUNT_ADDED;

  // `withBlocker`があるのは B タイプのローダーでも利用するため
  constructor(public withBlocker = false) { }
}

export class LoadCountRemoved implements Action {
  readonly type = LOAD_COUNT_REMOVED;
  constructor(public withBlocker = false) { }
}
/**
 * state
 */
const initialState: State = {
  loadCount: {
    withBlocker: 0,
    withoutBlocker: 0,
  },
};
stateをsubscribe
export class AppComponent {
  constructor(private store: Store<fromRoot.AppState>) {

    // http://ricostacruz.com/nprogress/を利用

    NProgress.configure({ showSpinner: false });
    this.store.select(fromRoot.getProgressNeeded)
      .subscribe(needed => {
        needed ? NProgress.start() : NProgress.done();
      }
    );
  }
}
Bの実装方針
- 必要なタイミングでdispatchすればいい
利用例
 @Effect()
  load$: Observable<any> = this.actions$
    .ofType<actions.LoadData>(actions.LOAD_DATA)
    .map(action => action.payload)
    .switchMap(key => {

      // `withBlocker`フラグをtrueにする
      this.store.dispatch(new layout.LoadCountAdded(true));

      return this.service.getData(key)
        .catch(() => {
          // TODO
        })
        .finally(
          () => this.store.dispatch(new layout.LoadCountRemoved(true))
        );
    });
stateをsubscribe
// app-blockerというブロッカーコンポーネントの表示非表示をコントロールする
@Component({
  selector: 'app-root',
  template: `<router-outlet></router-outlet>
  <app-blocker *ngIf="blockerNeeded$ | async"></app-blocker>`,
  styles: [],
})
export class AppComponent {
  blockerNeeded$: Observable<boolean>;
  constructor(private store: Store<fromRoot.AppState>) {
    this.blockerNeeded$ = this.store.select(fromRoot.getBlockerNeeded);
  }
}
BlockerComponent
@Component({
  selector: 'app-blocker',
  template: `
  // bootstrap4のクラス
  // やっていること -> 中央にコンテンツを配置
  <div class="d-flex justify-content-center align-items-center h-100">
    <app-spinner size="lg"></app-spinner>
  </div>
  `,
  styles: [`
  :host {
    position: fixed;

    // 状況に応じて変更
    // z-index: 1000;

    top: 0;
    left: 0;
    width: 100%;
    height: 100%;
    background-color: rgba(255,255,255,.38);
  }`]
})
export class BlockerComponent {
}
通信エラー
実装方針
- エラー表示ロジックを実装した
HttServiceをつくる HttServiceではエラー表示ロジックのみ実装し、エラーの解決はしない- エラーの解決は利用状況により異なることが想定されるので、各Feature Serviceにまかせる
@Injectable()
export abstract class HttpService {
  protected apiUrl = environment.apiUrl;
  constructor(
    protected http: HttpClient,
    private injector: Injector,
  ) { }

  // resolve cyclic dependency
  get ngbModal(): NgbModal {
    return this.injector.get(NgbModal);
  }

  protected handleError(err: HttpErrorResponse | Error): ErrorObservable {
    const modalRef = this.ngbModal.open(NgbmAlertComponent, {
      backdrop: 'static'
    });

    // エラー処理
    if (err instanceof Error || err.error instanceof Error) {

      const msg = err instanceof Error ? err.message : err.error.message;

      // A client-side or network error occurred
      Object.assign(modalRef.componentInstance, {
        title: 'Error',
        message: `An error occurred: ${err.message}`
      });
    } else {

      // The backend returned an unsuccessful response code.
      Object.assign(modalRef.componentInstance, {
        title: 'Error',
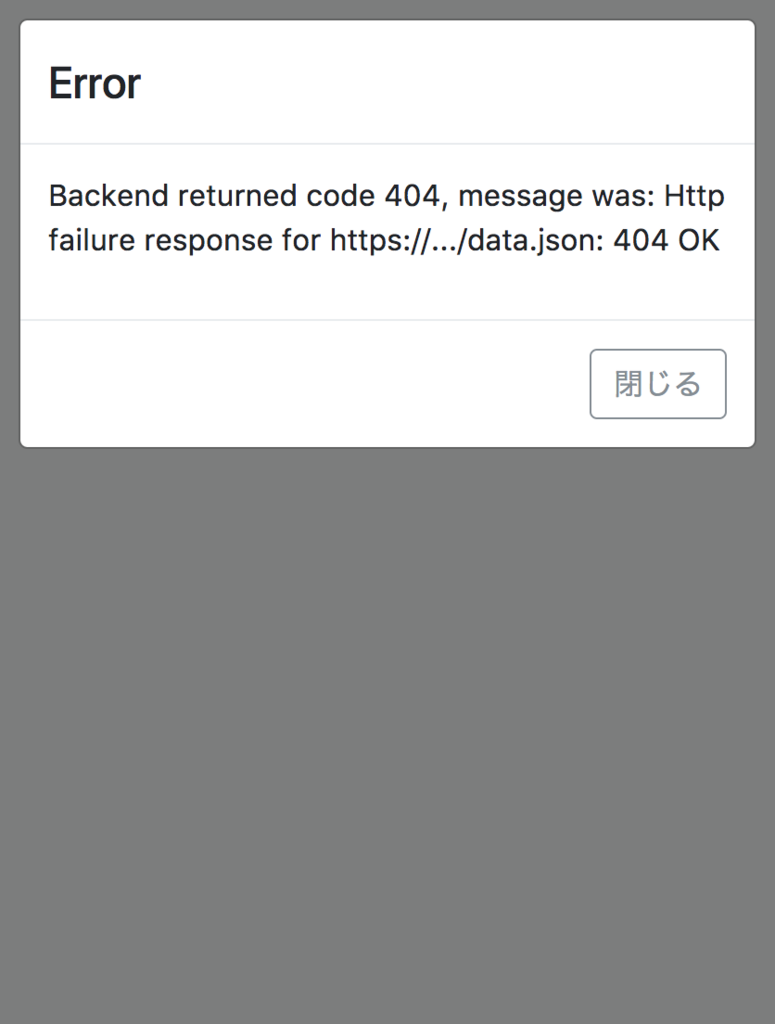
        message: `Backend returned code ${err.status}, message was: ${err.message}`
      });
    }
    return Observable.throw(err);
  }
}
利用例
@Injectable()
export class ApiService extends HttpService {
  getHero(): Observable<Hero> {
    return this.http
      .get(`${this.apiUrl}/hero.json`)
      .pipe(
        map(json => /* ... */),
        catchError(err => this.handleError(err))
      );
  }
}
(WIP) createEmbeddedViewとcreateComponen
templateを利用して動的にコンポーネントを生成する
this.viewContainer.createEmbeddedView(this.templateRef);
- 何が起きているか
- Angularが生成した
<ng-template>を利用して、embedded viewを作成。作成したembedded viewをホスト要素に隣接するview containerに差し込む - 隣接とは
- Angularが生成した
ViewContainerRef
createEmbeddedView- templateRefからEmbeddedViewRefを生成してinsert
createComponent- ComponentFactoryからComponentRefを生成してinsert
insert(viewRef: ViewRef, index?: number): ViewRefclear(): void
TemplateRef
- 2つの利用方法
<ng-template>に配置されたディレクティブ(or directive prefixed with *)- TemplateRefがinjectされる
- Query
EmbeddedViewRef
サンプル
import { Directive, Input, TemplateRef, ViewContainerRef } from '@angular/core';

@Directive({
  selector: '[appUnless]'
})
export class UnlessDirective {
  private hasView = false;

  constructor(
    private templateRef: TemplateRef<any>,
    private viewContainer: ViewContainerRef) { }

  @Input() set appUnless(condition: boolean) {
    if (!condition && !this.hasView) {

      // メモ: コンポーネントから生成する場合
      // this.viewContainer.createComponent(
      //   this.componentFactoryResolver.resolveComponentFactory(component)
      // );

      this.viewContainer.createEmbeddedView(this.templateRef);
      this.hasView = true;
    } else if (condition && this.hasView) {
      this.viewContainer.clear();
      this.hasView = false;
    }
  }
}
参考
ControlValueAccessorでRadioボタンを含むコンポーネントを実装するメモ
(change)を利用ViewChildrenを利用ref.nativeElement.checked = true;でViewを更新
RadioComponent
import { Component, ElementRef, QueryList, ViewChildren } from '@angular/core';
import { ControlValueAccessor, NG_VALUE_ACCESSOR } from '@angular/forms';

@Component({
  selector: 'app-radio',
  template: `
  <label *ngFor="let value of values">
    <input type="radio"
      (change)="onChange($event.target.value)"
      name="radio" [value]="value" #radio>{{value}}
  </label>
  <pre></pre>
 `,
  styles: [`:host {
    display: block;
    background-color: #fcc;
  }`],
  providers: [
    {
      provide: NG_VALUE_ACCESSOR,
      useExisting: RadioComponent,
      multi: true
    }
  ]
})
export class RadioComponent implements ControlValueAccessor {
  @ViewChildren('radio') private radios: QueryList<ElementRef>;
  values = ['foo', 'bar', 'baz'];

  onChange: (value: string) => void;
  onTouched: () => void;

  // ControlValueAccessor
  writeValue(value: string) {
    if (value) {
      const target = this.radios.find(radio =>
        radio.nativeElement.value
      );
      if (target) {
        toChecked(target);
      }
    }
  }
  registerOnChange(fn: any) {
    this.onChange = fn;
  }
  registerOnTouched(fn: any) {
    this.onTouched = fn;
  }
}

function toChecked(ref: ElementRef) {
  ref.nativeElement.checked = true;
}
利用例
<app-radio name="radio" [ngModel]="(form$ | async).radio"></app-radio>
11月メモ・リンク集
11月に調べたことのメモです。
ngrx関連
- platform/api.md at master · ngrx/platform · GitHub
OnRunEffects- Effectsのライフサイクルをコントロールする
- platform/adapter.md at master · ngrx/platform · GitHub
- Entity Adapter
各Feature Module(Page Module)のステートを、画面遷移時にリセットする
- meta reducerを使って以下のように実装
LEAVE時にFeatureAのステートをundefinedにする -> 各reducersでinitial stateを設定する
feature-a.module
// ...

StoreModule.forFeature(
  'feature-a',
  fromFeatureA.reducers,
  {  metaReducers: [fromFeatureA.resetReducer]  }
),
reducers/index.ts
// ...

export function resetReducer(reducer: ActionReducer<FeatureAState, routeActions.Actions>) {
  return function (state, action) {
    if (action.type === routeActions.LEAVE) {
      return reducer(undefined, action);
    } else {
      return reducer(state, action);
    }
  };
}
Angular関連
Component/Directive関連
- angular - How to add/remove class from directive - Stack Overflow
- rendererを利用して、Hostエレメントにクラスを追加/削除する
this.renderer.addClass(this.elementRef.nativeElement, className)
アプリケーションに依存するデータを表示するコンポーネントのインターフェース(@Input)について
コンポーネントで必要とするデータと、実データ(e.g. アプリ上で利用しているデータ型)の違いがある場合。柔軟なインターフェースにしたほうがいい場合。
@Inputに渡すデータの型をどうするか- データの形式を固定してしまうと、いつか苦労する
- APIによってサーバから送られるデータが違う場合
- サーバからもらうデータと、クライアントで作成したデータが同じ構造になるとは限らない
- データの形式を固定してしまうと、いつか苦労する
@Inputの数 = 更新タイミングの数- 不要に増やしたくはない
show-data.component.ts
 export interface IShowDataProps {
  a: number;
  b: numebr;
  c?: string;
  d?: string;
  e?: boolean;
}

// ...

export class ShowDataComponent {
  /**
   * `appData`か`props`のどちらかを受け取り
   * `_props`をつくる
   */
  _props: IShowDataProps;
  @Input() set params(
    params: { appData?: AppData, props?: IShowDataProps, options?: any }
  ) {
    if (params.appData) {
      this._props = this.toProps(params.appData);
    } else if (params.props) {
      this._props = params.props;
    }
  }
  get props() { return this._props; }

  // ...

}
page.html
<show-data [params]="{ appData: appData }"></show-data>
<show-data [params]="{ appData: appData, options: {...} }"></show-data>
<show-data [params]="{
  props: {
    a: 100,
    b: 1000',
    c: 'c',
    e: true,
  }
}">
Form関連
- AngularのForm(応用) - ryotah’s blog
- 2つのForm Moduleの基本機能を確認サンプル(バリデーション含む)
- angular - angular2 form + async validation + ChangeDetectionStrategy.OnPush = no view refresh? - Stack Overflow
CSS関連
AngularのForm(応用)


これは何か
AngularConnect 2017のセッション「Angular Forms - Advanced Topics」を自分用にまとめたものです。 セッションではCustom Form Controls、ControlValueAccessor、Formを入れ子にする場合のベストプラクティスなどについて話されています。
Angular v5.0.2で動作確認しています。
- スライド
- 動画
- セッション一覧
Custom Form Controls
- 自作のフォームパーツをつくる
ControlValueAccessorを利用する- バリデーションが必要な場合は
Validatorも利用する- 外部から(利用するテンプレートから)
requiredなど既存のバリデーションを付与することも可能だが、コンポーネントの機能として必須な条件があれば、内部で定義した方がいい
- 外部から(利用するテンプレートから)
NG_VALUE_ACCESSORを利用する
@Component({
  // ...
  providers: [
    {
      provide: NG_VALUE_ACCESSOR,
      useExisting: FooComponent,
      multi: true
    },
    {
      provide: NG_VALIDATORS,
      useExisting: FooComponent,
      multi: true
    }
  ]
})
export class FooComponent implements ControlValueAccessor, Validator {

  // ControlValueAccessor
  writeValue(obj: any) {
  }
  registerOnChange(fn: any) {
  }
  registerOnTouched(fn: any) {
  }
  setDisabledState(disabled: boolean) {
  }

  // Validator
  validate(ctrl: AbstractControl) {
  }
}
NgControlを利用する

- コンポーネント内でcontrolにアクセスしたい場合(control.errorsを利用したい)
[control]=dir.control #dir="ngModel"や[control]=form.get('foo') formControlName="foo"でもできるが、毎回書くのは煩わしいNgModelやFormControlNameは利用しないでNgControlを利用する(Template-driven、Reactive両方で利用できるようにするため)
provide: ...は不要になる- @Selfにする意味
export class FooNgControlComponent implements ControlValueAccessor {

  constructor(@Self() public controlDir: NgControl) {
    controlDir.valueAccessor = this;
  }

  ngOnInit() {
    const control = this.controlDir.control;
    const validators = control.validator
      ? [control.validator, Validators.required]
      : Validators.required;
    control.setValidators(validators);
    control.updateValueAndValidity();
  }

  // ControlValueAccessor
  writeValue(obj: any) {
  }
  registerOnChange(fn: any) {
  }
  registerOnTouched(fn: any) {
  }
  setDisabledState(disabled: boolean) {
  }
}
サンプルコード
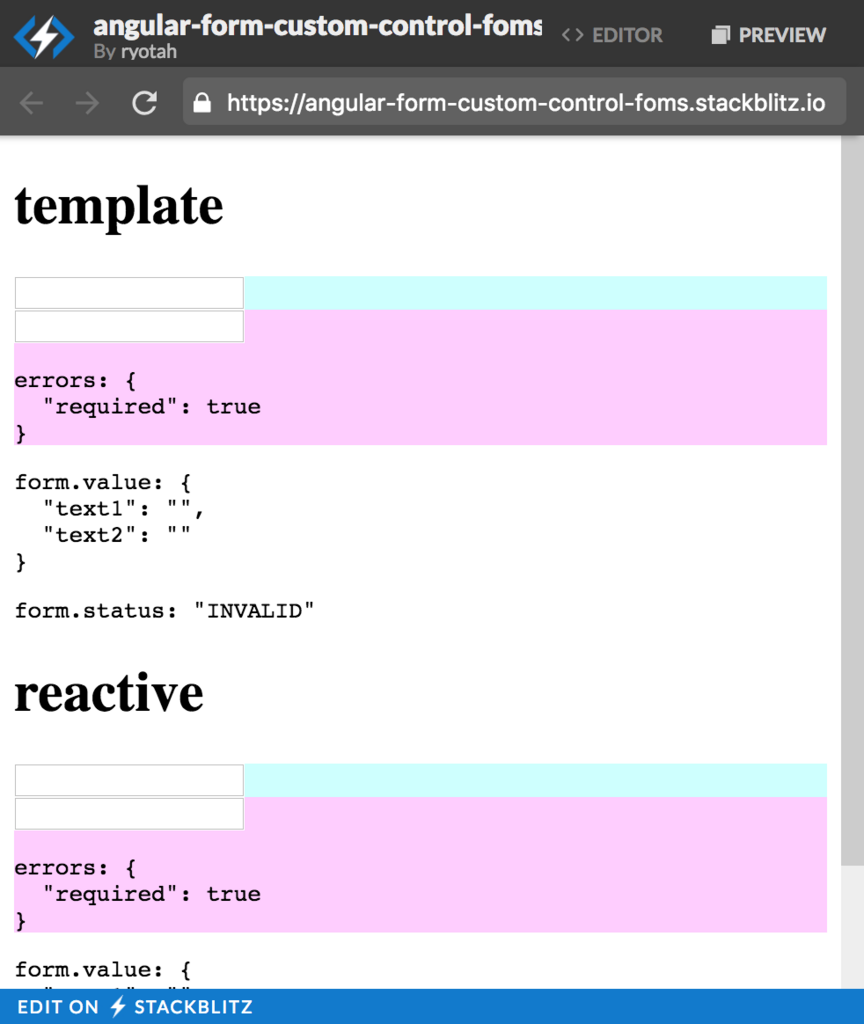
- angular-form-custom-control-foms - StackBlitz
RequiredTextComponentとRequiredTextNgControlComponent- それぞれ、Template-drivenとReactive、両方から利用
メモ
- ControlValueAccessor
- writeValue
- Viewに値を反映するメソッド
- registerOnChange
- UI上でcontrolの値が変更されたときに呼ばれるコールバックを登録
- registerOnTouched
- setDisabledState
- writeValue
- Validator
- NgControl
FormControlをDOMにバインドする- サブクラス
フォームの入れ子
ControlValueAccessorを利用
FormGroupの値を利用して、データの受け渡しをする- Template-drivenとReactive両方で利用できる
@Component({
  selector: 'app-address',
  template: `
  <div [formGroup]="form">
    <input type="text" formControlName="street">
    <input type="text" formControlName="city">
  </div>`,
  providers: [
    { provide: NG_VALUE_ACCESSOR, /* ... */ },
    { provide: NG_VALIDATORS, /* ... */ },
  ]
})
export class AddressComponent  implements OnInit, ControlValueAccessor {
  form: FormGroup;
  constructor(private fb: FormBuilder) { }

  ngOnInit() {
    this.form = this.fb.group({
      street: '',
      city: ''
    });
  }

  // ControlValueAccessor
  writeValue(obj: any) {
    if (obj) {
      this.form.setValue(obj, { emitEvent: false });
    }
  }
  registerOnChange(fn: any) {
    this.form.valueChanges.subscribe(fn);
  }
  registerOnTouched(fn: any) {
  }
}
Template-driven専用
- シンプルですぐ実装可能
ngModelGroupを利用するためにControlContainerをinjectする- viewProvidersを利用する
@Component({
  selector: 'app-address-template',
  template: `
  <div ngModelGroup="address">
    <input type="text" name="street" ngModel>
    <input type="text" name="city" ngModel>
  </div>
    `,
  viewProviders: [
    {
      provide: ControlContainer,
      useExisting: NgForm
    }
  ]
})
export class AddressTemplateComponent {
}
Reactive専用
- シンプルですぐ実装可能
- FormGroupに子コンポーネントが自分でコントローラを登録する
- ちょっと奇妙な書き方に感じる
@Component({
  selector: 'app-address-reactive',
  template: `
  <div formGroupName="address">
    <input type="text" formControlName="street">
    <input type="text" formControlName="city">
  </div>
    `,
  viewProviders: [
    {
      provide: ControlContainer,
      useExisting: FormGroupDirective
    }
  ]
})
export class AddressReactiveComponent {

  constructor(private parent: FormGroupDirective) {
  }

  ngOnInit() {
    // FormGroupを取得
    const form = this.parent.form;

    // 自身で、親のFormGroupにコントローラを登録する
    form.addControl('address', new FormGroup({
      street: new FormControl(''),
      city: new FormControl(''),
    }));
  }
}
サンプルコード
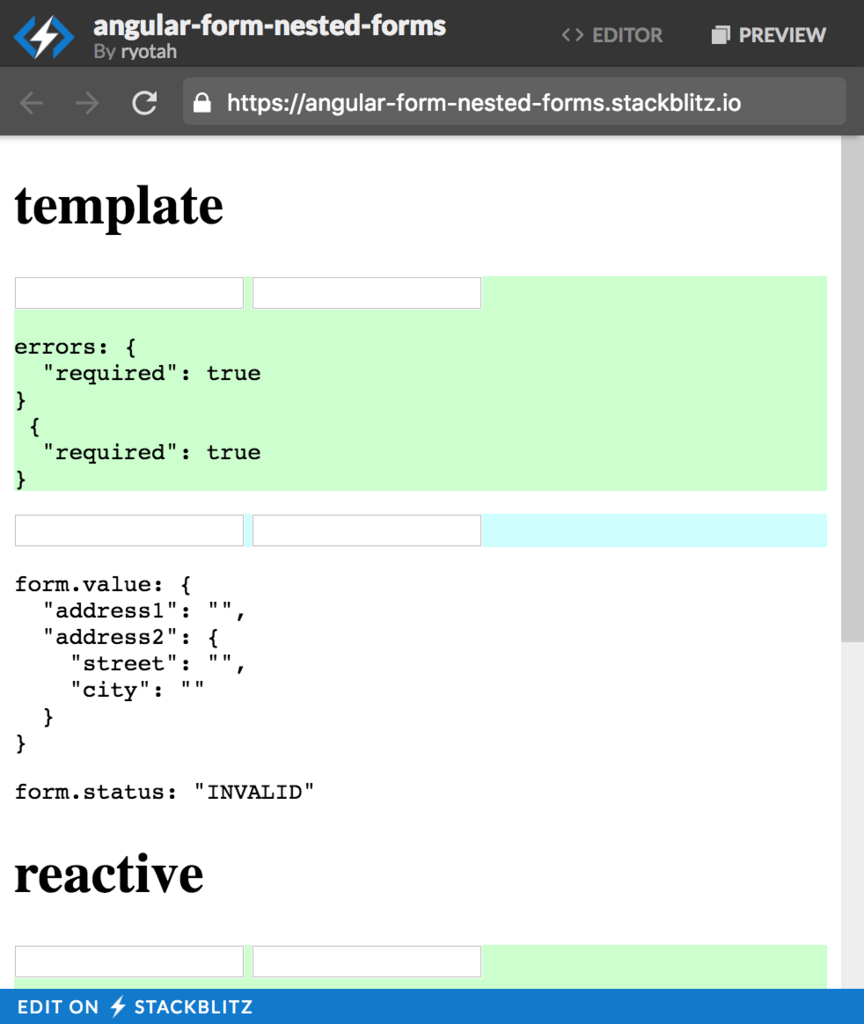
- angular-form-nested-forms - StackBlitz
AddressComponentControlValueAccessorを利用- Template-driven、Reactive両方で利用可能
AddressTemplateComponent- Template-drivenで利用可能
AddressReactiveComponent- Reactive両方で利用可能
メモ
- ControlContainer
- 複数の
NgControlを含むディレクティブ - サブクラス
- AbstractFormGroupDirective
This is a base class for code shared between NgModelGroup and FormGroupName.
- NgModelGroup
- FormGroupName
- NgForm
- FormGroupDirective
- FormArrayName
- AbstractFormGroupDirective
- https://docs.google.com/presentation/d/e/2PACX-1vTS20UdnMGqA3ecrv7ww_7CDKQM8VgdH2tbHl94aXgEsYQ2cyjq62ydU3e3ZF_BaQ64kMyQa0INe2oI/pub?start=false&loop=false&delayms=3000&slide=id.g293d7d2b9d_1_1473
- 複数の
Error Aggregator
- フォーム内の各コントローラのエラーを集約して表示させたい場合
- formをprojectionするのはさせよう
- Template-driven、Reactive、どちらかでしか利用できないような設計になる
- 難しくなるし、バグが発生しやすくなる
- もうすこし良い設計があるはず
@Component({
  selector: 'error-aggregator',
  template: `
  <div *ngFor="let error of errors">{{error | json}}</div>`,
})
export class ErrorAggregatorComponent implements OnInit {
  @Input() form: FormGroup;
  errors;
  constructor() { }
  ngOnInit() {
    // NgFormを間違って渡していないか確認
    if (this.form instanceof FormGroup) {
      this.form.statusChanges.subscribe(val => {
        this.errors = this.reduceErrors();
      });
    }
  }
  private reduceErrors() {
    return pickErrors(this.form);
  }
}

// for demo
function pickErrors(formGroup: FormGroup) {
  debugger;
  const keys = Object.keys(formGroup.controls);
  return keys.map(key => {
    const control = formGroup.controls[key];
    if (control instanceof FormControl) {
      return control.errors;
    } else if (control instanceof FormGroup) {
      return pickErrors(control);
    }
  });
}
サンプルコード
参考
- AngularのForm(Template-driven Forms)メモ - ryotah’s blog
- angular-form-basic-template-driven - StackBlitz
- Template-drivenサンプル
- 基本的なバリデーション、入れ子構造フォーム
- angular-form-basic-template-driven - StackBlitz
- AngularのForm(Reactive Forms)メモ - ryotah’s blog
- angular-form-basic-reactive - StackBlitz
- Reactiveサンプル
- 基本的なバリデーション、入れ子構造フォーム
- angular-form-basic-reactive - StackBlitz
- Custom Form Controls in Angular by thoughtram
ControlValueAccessor
- Angular Forms in Depth – nrwl
メモ
- 以前のコード
// ...
@Input() model?: string;
@Input() form: NgForm;
@ViewChild('ngModel') ngModel: NgModel;
ngOnInit() {
  this.form.addControl(this.ngModel);
}
// ...
10月メモ・リンク集
これは何か
- 10月に調べたことのメモ
- 基本形式は、「参考URLとそれに関するメモとコメント」
ngrx関連
ngrxとフォーム
- FormControl Freaks: Redux Edition - Daniel Figueiredo Caetano & Renee Vrantsidis - YouTube
- Reduxを使ったフォームの構築
- Template-driven Formsを利用
- ngrxでも考えは一緒
- validはデータとして持つのではなく、selectorで
- formcontrol-freaks/chapter.md at master · renvrant/formcontrol-freaks · GitHub
- スライド版
- Reduxを使ったフォームの構築
Introducing @ngrx/entity – @ngrx – Medium
- 新パッケージ
entityに関して - platform/docs/entity at master · ngrx/platform · GitHub
状態のリセット
- angular - How to reset all states of ngrx/store? - Stack Overflow
- 各 feature moduleで
metaReducersを利用してリセット(初期値)に戻す方法
// foo.module.ts
...
StoreModule.forFeature(
  'foo',
  fromCalendar.reducers,
  {
    metaReducers: [fromFoo.resetReducer]
  }
),
...

// reducers/index.ts
export function resetReducer(reducer: ActionReducer<FooState, reset.Actions>) {
  return function (state, action) {
    if (action.type === RESET) {
      return reducer(undefined, action);
    } else {
      return reducer(state, action);
    }
  };
}
How to share state between reducers best practice · Issue #159 · ngrx/example-app · GitHub
ActionReducerMapとcombineReducers- Beyond combineReducers · Redux
- Reduxにおけるreducer分割とcombineReducersについて - Qiita
Rx関連
unsubscribe
- RxJS: Don’t Unsubscribe – Ben Lesh – Medium
- Unsubscribe処理を必要以上に実行しないですむようなRxの書き方について
takeUntil,takeWhileなど
- Angular/RxJs When should I unsubscribe from
Subscription- Stack Overflow- Angularのコンポーネント内で作成したsubscriptionをどのようにunsubscribeするか
ngOnDestroy,Subject,takeUntilを効果的に利用する
その他
- Observable.throw()が返すオブジェクトの型はErrorObservable - ryotah’s blog
- 「テキスト入力 -> 自動で検索開始」を実現するためのRx使い方 - ryotah’s blog
- Http - Observable completed function not firing · Issue #7865 · angular/angular · GitHub
- completeはエラー時には実行されない
- finallyを利用
Angular関連
view操作
- angular4 forms - Load Dynamic templates within a single component using Angular 4 - Stack Overflow
- 前月から引き続き
- templateを動的に外部から読み込んで表示させる #angular
- サンプル
- javascript - How to use Angular structural directive with multiple inputs - Stack Overflow
- Structural Directiveで複数のInput渡し方
<div *permissionIf="permissions;except:'Read'"></div>- 最終的には以下のようになる
<template [permissionIf]="permissions" [permissionIfExcept]="'Read'">...
- 最終的には以下のようになる
- 動的に、対象要素の内部にコンポーネントを追加する #angualr · GitHub
- 「host要素の次に配置」ではなく、内部に追加したい場合は
renderer.appendChildを使う - Using Renderer2 in Angular
- 「host要素の次に配置」ではなく、内部に追加したい場合は
ngOnInit() {
  const componentFactory = this.componentFactoryResolver.resolveComponentFactory(SpinnerComponent);
  const componentRef = componentFactory.create(this.viewContainer.injector);
  this.renderer.appendChild(
    this.viewContainer.element.nativeElement,
    componentRef.location.nativeElement
  );
}
- RouterLinkActiveとそれをtemplate variableとして利用したときに #angular · GitHub
exportAsの重要性- 上手く使えば簡単でシンプルなコードを提供できるようになる
フォーム
export class ChildComponent implements OnInit {
  ...
  @ViewChild("model") ngModel: NgModel;

  ngOnInit() {
    this.parentForm.addControl(this.ngModel); // <== add this
    this.parentForm.valueChanges.subscribe(changes => {
      console.log(JSON.stringify(changes));
    });
  }
}
その他
null vs undefined
- null - JavaScript | MDN
- APIにおいては、通常はオブジェクトが返されるところで、関連したオブジェクトがない場合に
nullがよく渡されます。
- APIにおいては、通常はオブジェクトが返されるところで、関連したオブジェクトがない場合に
nullvs.undefinedin TypeScript land – BASARAT – MediumDon’t initialize optional sub propertiesは確かに
TypeScript
- Revised Revised 型の国のTypeScript | Revised Revised TypeScript in Definitelyland](http://typescript.ninja/typescript-in-definitelyland/)
スニペット
Bootstrap4, デスクトップファースト
// Media of at most the maximum breakpoint width. No query for the largest breakpoint.
// Makes the @content apply to the given breakpoint and narrower.
@mixin media-breakpoint-down($name, $breakpoints: $grid-breakpoints) {
  $max: breakpoint-max($name, $breakpoints);
  @if $max {
    @media (max-width: $max) {
      @content;
    }
  } @else {
    @content;
  }
}
Htmlの<base href>を取得
// <base href="/ja/">
const bases = document.getElementsByTagName('base');
if (bases.length > 0) {
  const baseHref = bases[0].href;
  // -> 'https://foo.com/ja/'
}
Bugsnag
import { ErrorHandler, Injectable } from '@angular/core';
import { environment } from '../../environments/environment';

@Injectable()
export class GlobalErrorHandler implements ErrorHandler {
  constructor() {
    Bugsnag.releaseStage = environment.stage;
  }
  handleError(error) {
    Bugsnag.notifyException(error);
    throw error;
  }
}
ローダーのオンオフ、簡易版
function disable() {
  const elm: HTMLElement | null = document.getElementById('blocker');
  if (elm) {
    elm.classList.add('active');
  }
}

function enable() {
  const elm: HTMLElement | null = document.getElementById('blocker');
  if (elm) {
    elm.classList.remove('active');
  }
}
Clickメモ
Array.apply(null, document.querySelectorAll('input[type=radio][value="3"]')).forEach(elm => elm.click());